Getting Started With React - Part 1: Setting Up the File Directory
Recently I’ve had the opportunity to do some work with React, the JavaScript libary put together by Facebook for building user interfaces. It’s been a really cool experience, and I’m growing more comfortable working with React everyday.
That’s not to say the process has been hiccup free - it’s been littered with (surmountable) obstacles. Though that’s to be expected when you’re new to any library, it’s particularly pronounced in this instance by the absence of a standardized format for React projects.
You see, there is no rails new ... for React. There are several super helpful boilerplate templates and generators, but they’re not uniform. People pretty much include whatever they think they’ll need, and they all have different ideas as to what exactly that is.
I’m not going to tell you that my preferences are any better than those of the folks who have done this work,1 but I am willing to wager that mine are more minimal. I’m interested in having the bare-bones setup for getting up and running, and we can add other stuff later.
So, in what follows, I want to lay out the steps for setting up a file directory you can use to build a React project. We’ll include only what we need to start hacking, and then cover further topics in subsequent posts. If you’re willing to hop on for the ride, let’s dive into part 1 of getting started with React.
Step 1: Setting Up Your package.json File
One thing we’ll be using to manage our project’s dependencies is npm - the Node Package Manager. If you don’t have that, you’ll want to install Node.js and npm now.2
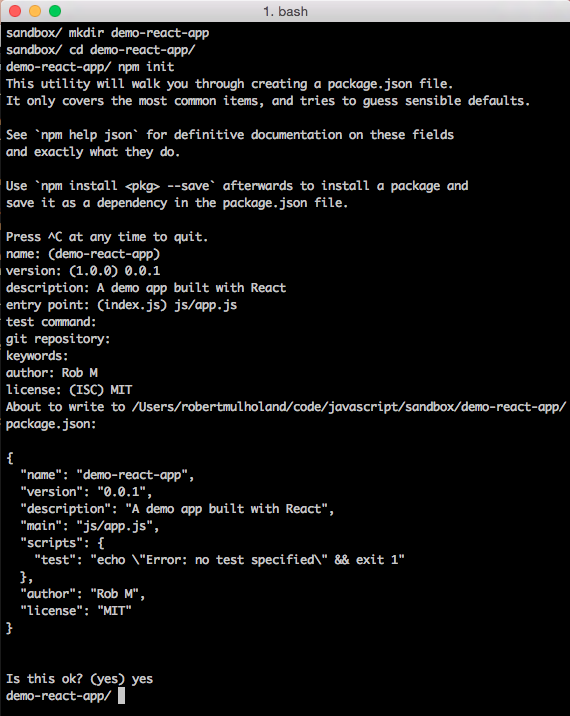
Once you’ve got npm, you can run npm init in an empty directory to setup a basic package.json file. By answering the prompts, you’ll identify some key attributes of your project: its name, version, license, etc.
Once we’ve got a basic package.json file setup, we can add one of the more important dependencies for our project - React - with a single command: npm install --save react.3
Next, we can install some dev dependencies we’ll be needing: npm install --save-dev browserify reactify.4 Browserify will enable us to compile modules for the browser, and Reactify will help Browserify to play nicely with the JSX syntax we’ll be using in our React modules.
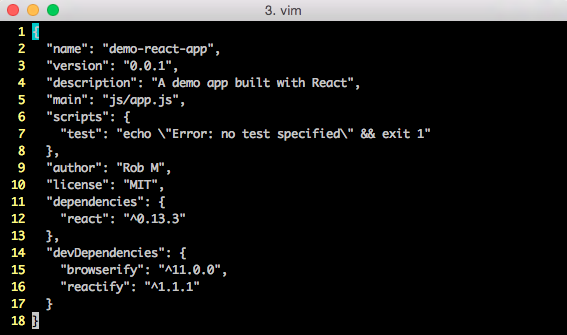
At this point, your package.json file should look something like this:
We’ll want to add a build script to make it look like this:
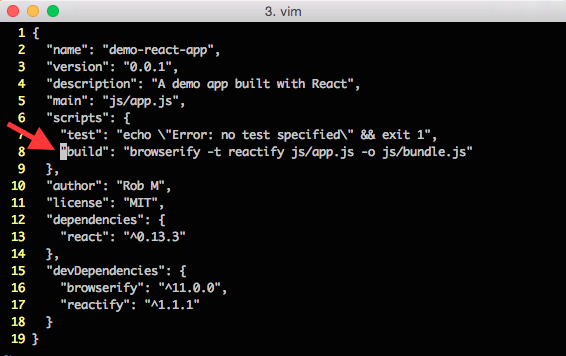
And then install browserify globally so that our script will execute: npm install -g browserify.5
That will do it for our package.json file, for now. Time to start building out the rest of our file directory structure.
Step 2: Add Files/Directories
Just by setting up our dependencies and build script, we’ve done most of the leg work necessary to get a React project up and running. The next step is pretty simple: put together the file directory structure.
There are a number of ways you could organize your directory, but to play nicely with our current setup, you’ll want to run the following commands:
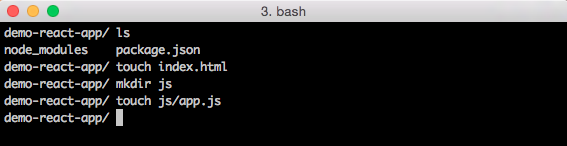
That will set up a file tree that looks like this:
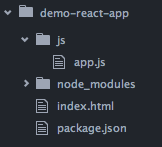
At this point, we’re ready to put in some code!
Step 3: Filling in index.html
The index.html file stores the basic page we’ll be working on. You can fill it in like so:
The key to this file is the section with the id “react” - that’s the entry point for our React code. It’ll be filled in by the bundle.js script (which is generate by Browserify).
Step 4: Filling in app.js
Almost there! The next step is to pop some code into our app.js file that indicates what to put in the “react” section. You can do that like so:
This code tells React to find the page element with the id “react” and put the preceding JSX code (which looks like raw html) there.
Step 5: Build and Run
At this point, we’ve got all the hand-written code we’re going to need. The next step is to run npm run build, which will trigger the build script we put in our package.json file.
After that’s complete, we’re ready to fire up our app! To do that, we need an http server. The easiest way to get one is probably to run npm install -g http-server.
Once that’s installed, head to your project’s root directory and run http-server. Pull up the browser and head over to http://localhost:8080/ and…
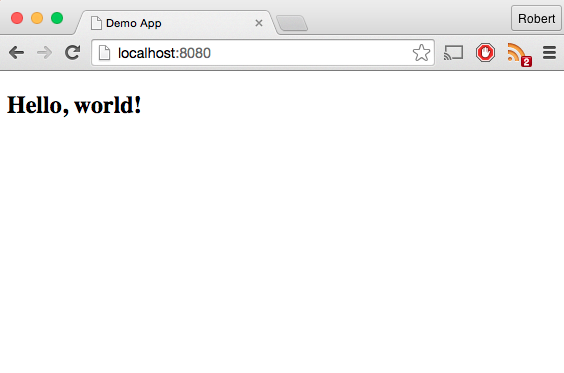
It’s alive! That’s not exactly the fancy view we were hoping for when we decided to explore this newfangled UI library, but it’s a start!
Conclusion
So, we clearly have a lot more to learn before we can start really taking advantage of React’s power, but we are now working with the library. Just by installing a few dependencies, filling out a few files, and executing a few scripts, we’re right about where we’d expect to be with something like a rails new ... for React.
Stay tuned for future posts on getting started with React!6
-
They’re awesome ↩
-
Seriously, if you’ve read this far, you’re definitely going to want these things. ↩
-
The
--saveflag tells npm to list react in thedependenciessection of ourpackage.jsonfile. That’s useful for anyone who clones our repo, since they can now runnpm installto install all of the project’s dependencies. ↩ -
The
--save-devflag tells npm to list Browserify and Reactify in thedevDependenciessection of ourpackage.jsonfile. ↩ -
The
-gflag tells npm to install Browserify globally, so that we can runbrowserifyfrom the command line anywhere on our system. ↩ -
If you’d like to follow along with the source code we’re developing over this series of posts, check out the demo-react-app Github repo. The changes from this post are reflected in the second commit. ↩